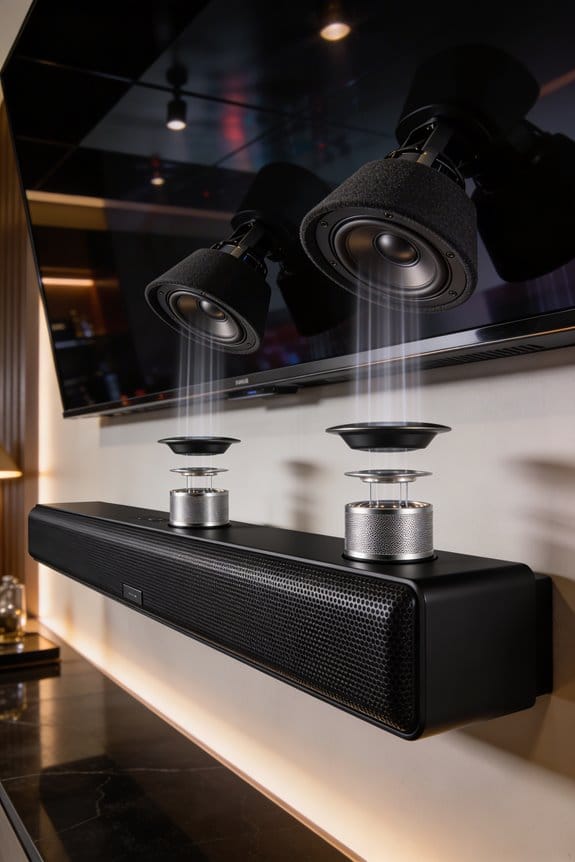
Up-firing speakers project sound waves at a 20-30 degree angle toward your ceiling, which acts as an acoustic mirror to reflect those waves back down and create height effects in your audio setup. I’ll explain that this works best with smooth, flat ceilings between 8-9 feet high, as textured surfaces or acoustic panels absorb sound instead of reflecting it. The narrow dispersion drivers in these modules keep sound beams tightly focused, and the Haas Effect merges direct and reflected sound seamlessly when timing stays ideal, preventing muddy audio from wave interference that occurs when sounds collide improperly.
Key Takeaways
- Up-firing speakers angle sound 20-30 degrees upward, bouncing audio off ceilings to create an overhead sound illusion through acoustic reflection.
- Ceilings act as acoustic mirrors, requiring smooth, hard surfaces like drywall to effectively reflect sound waves without energy loss.
- Critical reflection angles between 20-30 degrees and 8-9 foot ceiling heights optimize sound timing and prevent distortion from the Haas Effect.
- Narrow dispersion drivers focus sound beams tightly while frequency sensitivity around 2kHz enhances listener ability to localize height effects.
- Textured ceilings, acoustic panels, and heights exceeding 10 feet significantly degrade performance by absorbing or scattering reflected sound waves.
How Ceiling Reflections Create Height Effects With Up-Firing Speakers
Have you ever sat in your living room and thought, “Wouldn’t it be great if I could feel like I’m in the middle of a concert, right from my couch?” It’s possible to create that vibe, and it all comes down to how you position your up-firing speakers.
When you turn on an up-firing speaker module, those sound waves head straight up at an angle—typically 20 to 30 degrees. They hit your ceiling and bounce back down, which tricks your brain into thinking the sound is coming from above you instead of just from below. That’s where the magic happens!
However, it’s crucial that the reflected sound reaches your ears quickly. Otherwise, you might experience the Haas Effect, which messes with your sense of where the sound is coming from. You want that perfect timing for an immersive experience. Think of your ceiling as a kind of acoustic mirror, reflecting sound waves effectively. This setup allows your brain to locate sounds that seem to come from above the horizontal plane.
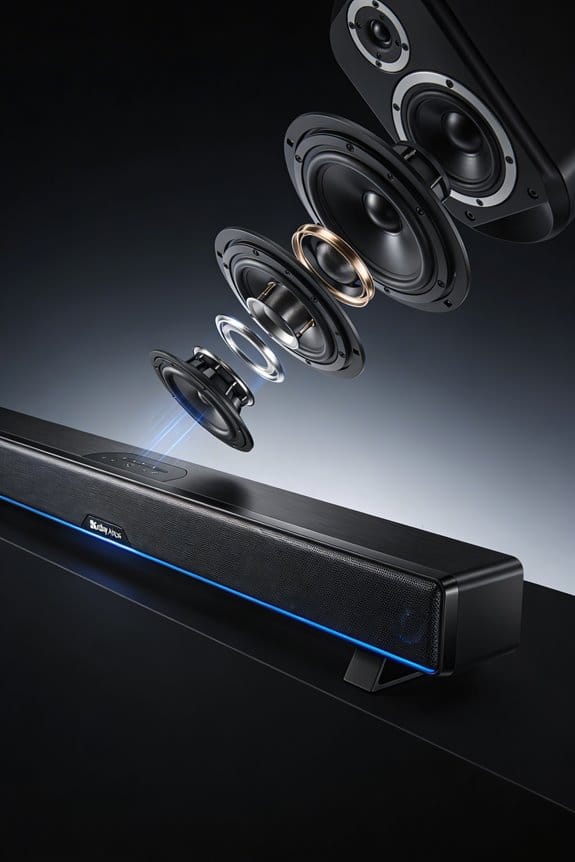
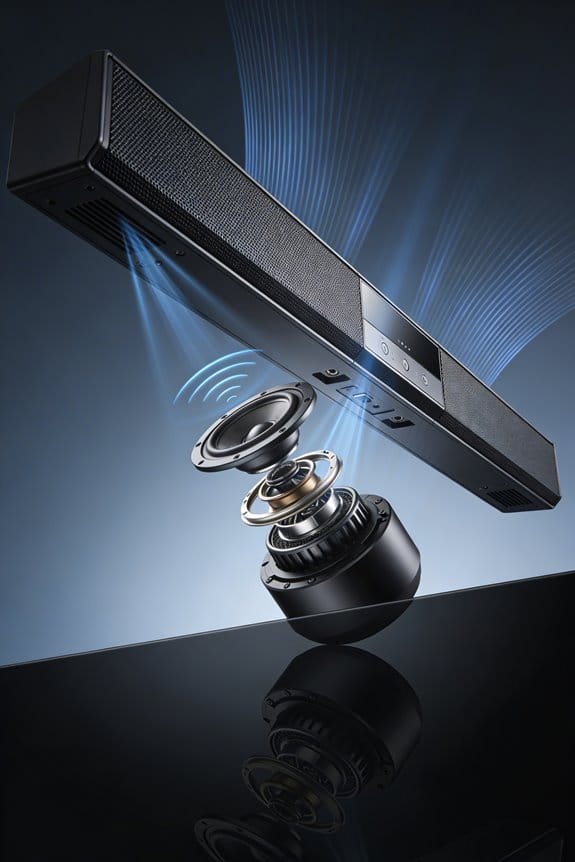
Here’s the trick: narrow dispersion drivers are essential because they direct the sound beam tightly. This helps keep the reflection from spreading all over the ceiling, which can dilute that height effect.
So, why does this matter? It’s about making your audio experience as realistic as possible. You can truly elevate (pun intended!) your home theater with some careful speaker placement and the right technology.
What Ceiling Types and Heights Work Best for Up-Firing Speakers?
Since up-firing speakers rely on ceiling reflections to create that immersive height effect, you really need to think about your ceiling’s features. Smooth drywall, plaster, or painted ceilings are perfect for this job, as they reflect sound waves nicely. On the flip side, stay away from textured ceilings, acoustic tiles, or dark foam panels. They absorb sound instead of bouncing it down to you, and that makes a big difference in your listening experience.
Now, when it comes to ceiling height, this can seriously impact how well your up-firing speakers perform. Ideally, you’re looking at heights between 8 and 9 feet. This range allows for controlled reflections, which keep the sound clear and evenly distributed. Ceilings higher than 10 feet can create all sorts of issues; they widen the reflection circle too much, leading to sound distortion and making it hard to pinpoint where the sound is coming from.
You want flat, horizontal ceilings for the best results. If your ceiling is vaulted or sloped, that could mess with the reflection angle and ruin the effect you’re trying to achieve. Remember, hard, reflective surfaces are key for those up-firing modules to really shine.
Reflection Angles and Wave Behavior: The Science Behind Up-Firing Systems
Have you ever noticed how some sound systems just don’t seem to fill the room like you wish they would? It’s all about understanding reflection angles. When you use up-fired speakers, those sound waves need to bounce off the ceiling at the right angles to reach your ears. Ideally, a 20-30 degree upward angle works best with typical ceiling heights of 8-9 feet. This setup ensures that the sound bounces right above your seating area for maximum impact.
Wave interference is another thing to consider. This happens when the reflected sound collides with the direct sound from your main speakers. It’s crucial that this timing is just right; otherwise, you could end up with a muddled audio experience. You want the reflected sound to hit your ears within a few milliseconds of the direct sound. This is key for keeping everything sounding clear and composed.
Think about your ceiling as a mirror for sound. It follows the basic rule of reflection—where the angle of the incoming wave equals the angle of the reflected wave. If your ceiling’s hard and flat, it’ll keep the wave energy strong as it bounces back down to you. That’s why materials matter. A hard surface can maintain the sound’s power on its journey back to your ears, which is crucial for getting that immersive height effect.
So, how do you set this all up? Here’s a simple tip: measure your seating position and adjust your speakers to hit that sweet reflection point on the ceiling. It could make all the difference in how your audio feels in the space.
In the end, understanding these basics can really enhance your listening experience. How are you planning to optimize your space for sound?
Why Narrow Dispersion Beats Wide Beams for Controlled Height Sound
Getting the sound right for that immersive experience can be tricky, especially when it comes to how sound spreads across your ceiling. If you’re trying to create a certain vibe, narrow dispersion drivers are your best bet. They focus the reflected sound into a tighter pattern, which helps with sound localization for those overhead effects you’re aiming for.
The 2kHz Dip and Haas Effect: Keeping Reflected Sound Undetectable
Have you ever noticed how reflected sound from your ceiling can sometimes feel off? It can be a real buzzkill when you’re trying to enjoy a movie or listen to music. The goal is to have that sound blend into the overall experience without making it obvious that it’s coming from a different source. To achieve this, you need to pay attention to sounds around the 2kHz mark because our ears are particularly sensitive there.
So, what’s the deal with 2kHz? Well, that’s where our hearing is sharpest, and we can easily pinpoint where sounds are coming from. If the reflection is noticeable, it can pull you out of the moment, which is why keeping that reflected sound under wraps is crucial.
Here’s where the Haas Effect comes into play. When a sound reflection reaches you within 20 to 40 milliseconds after the direct sound, your brain tends to merge them together into one single source. This timing is key! If the direct sound and the reflected sound match well in levels and timing, you won’t even notice the reflection—it’ll just feel like part of the entire experience.
To make it work, many up-firing sound modules are designed to create a dip in frequency around 2kHz. This little trick helps to keep those ceiling sounds from standing out.
So, next time you’re setting up your sound system, remember: it’s all about timing and frequency. Making sure everything sounds cohesive can take your audio experience to a whole new level.
Honestly, who doesn’t want a more immersive sound experience? It’s all about having that perfect blend that keeps you in the moment. How do you think your current setup stacks up?
Where to Position Up-Firing Modules for Optimal Bounce Angles
Finding the best spot for your up-firing speakers can feel tricky. It’s not just about convenience; that bounce angle really matters for getting the best sound to your listening spot.
Try this: mount the modules right on top of your front main speakers. This setup usually hits the sweet spot in rooms with 8-9 foot ceilings. You’ll want the up-firing drivers tilted at about 20-30 degrees toward the ceiling. This specific angle helps create a bounce that reflects sound directly to where you’re sitting.
Want to see how it works? Picture a flashlight aimed at your ceiling from where the speakers are. The spot where the light hits is your reflection point, and the way the light spreads out shows the sound dispersion. Adjust the angle until the beam centers on your listening area. It might take a bit of tweaking, but trust me, it’s worth it for the best height channel performance.
Up-Firing vs. Ceiling-Mounted Speakers: Sound Quality Trade-Offs
Have you ever stared at your living room, wondering why your surround sound just doesn’t cut it? Let’s dive into the world of up-firing versus ceiling-mounted speakers.
When it comes to sound quality, ceiling-mounted speakers really shine. They give you direct height channels without messing around with reflections. Unlike up-firing systems, which can be tricky depending on your ceiling, these speakers are placed right in the ceiling, providing clear and accurate height perception. With well-controlled placement at the right angles, you’ll get a solid listening experience—no guessing or bouncing sound waves to deal with.
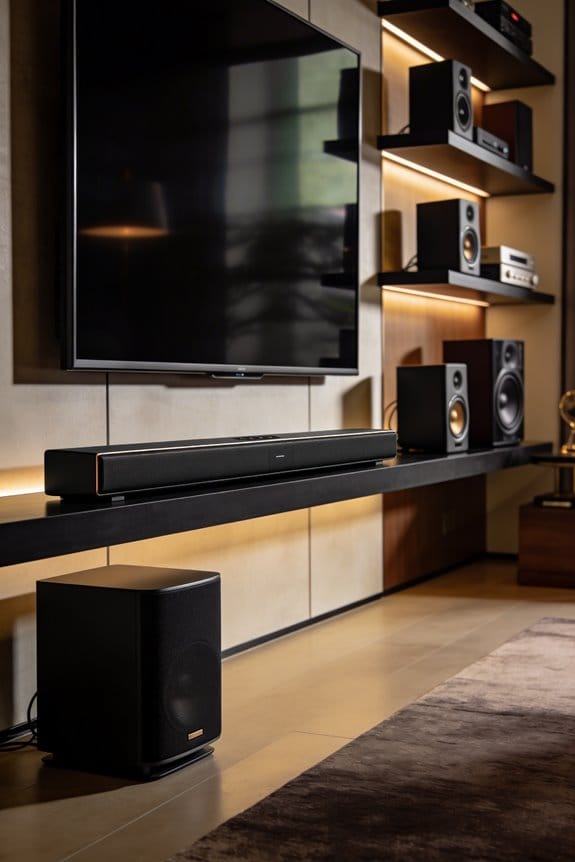
Now, don’t get me wrong. Up-firing speakers have their perks, especially for renters or those who can’t go all-in with a ceiling install. They can sound decent when your room ticks a few boxes, like having 8-9 foot flat ceilings and hard surfaces that bounce sound properly. So, if you’re dealing with tricky ceiling conditions, up-firing might just be the way to go for creating some height effects.
Here’s the catch, though: relying on reflections can lead to inconsistencies. If your ceiling isn’t ideal, the sound can suffer, and what you’re listening to won’t be what was intended. Frankly, that can take you out of the moment when you’re trying to enjoy your favorite movie or song.
How to Build and Test Your Own Up-Firing Atmos Setup
Building your own up-firing Atmos setup might feel overwhelming at first, but it’s really about breaking things down into simple steps. With a bit of planning and some basic tools, anyone can tackle this project.
DIY Speaker Design Components
What’s the key to getting great sound with your Atmos setup? Start by choosing narrow dispersion drivers like HiVi Swans. They really help control how sound reflects off surfaces. You’ll want to mount these drivers on top of your front mains at a 20-30 degree angle, directing the sound toward your ceiling. This position is crucial for creating that immersive experience. A good tip is to use MDF enclosures to securely house your drivers; it keeps everything stable.
Testing Techniques for Verification
Want to make sure you’ve got the placement right? Start out by testing your setup with binaural demo tracks through headphones. This gives you a sense of where the sweet spot is for height placement. Here’s the trick: think about light. Shine a flashlight from the same place as your drivers toward the ceiling. Pay close attention to where the beam hits; that’s where you want your sound to reflect. Adjust the angles until it targets your listening position, and you’ll enhance both the sound localization and the Atmos effect.
In the end, with some patience and experimentation, you’re well on your way to crafting an impressive up-firing Atmos system. Have you got any additional tips or experiences on setting up Atmos in your space?
Why Vaulted Ceilings and Acoustic Panels Kill Up-Firing Performance
When you’re setting up up-firing speakers in a room with a vaulted or sloped ceiling, you might run into some frustrating sound issues. Picture this: the sound waves from your speakers are bouncing off the angled surfaces and scattering like crazy. Instead of delivering a nice, controlled sound to your ears, those waves go off in unpredictable directions, which totally ruins that height effect you’re aiming for.
Now, add acoustic panels into the mix and things get even trickier. If you’re using sound-absorbing materials on your ceiling, they’re likely going to trap some of those reflected waves before they reach you. This could cut down the reflection strength by about 60 to 80 percent! You’ll notice that the foam or fabric tends to soak up frequencies around 2kHz, which are key for creating that overhead sound effect you want.
If your vaulted ceilings are over 10 feet high, you’re making it even harder on yourself. The extra distance stretches out the reflection circle, causing sound to spread over a larger area. This means you lose that pinpoint accuracy you need to distinguish sounds. For the best experience with up-firing speakers, you really should aim for flat, hard ceilings around 8 to 9 feet high.
Frequently Asked Questions
Can Up-Firing Speakers Work in Rooms With Ceiling Fans Installed?
I’ve tested this myself—ceiling fans disrupt up-firing performance. The spinning blades create ceiling fan effects that scatter sound wave interaction patterns, chopping reflections unpredictably. Turn off fans during critical listening, or you’ll lose that precise height illusion completely.
Do Up-Firing Modules Require Separate Amplification or Special Receiver Outputs?
I’ll explain the amplification requirements: up-firing modules need dedicated height channel outputs from an Atmos-enabled receiver. They’re not separately amplified—your receiver powers them through specific Atmos terminals, ensuring proper receiver compatibility with height channel processing.
How Much Should I Budget for Quality Up-Firing Speakers?
I’d budget $200-$400 per pair for quality brands like Klipsch or Elac. My neighbor spent $300 on up-firing modules and achieved excellent Atmos effects. Budget considerations include whether you’re buying standalone units or integrated speakers.
Will Furniture Placement Affect the Performance of Up-Firing Height Channels?
Yes, furniture placement matters considerably. Tall bookcases or cabinets between your speaker placement and ceiling can obstruct sound projection paths, blocking reflections before they reach the ceiling. I’d keep the upward path clear for peak performance.
Can I Mix Up-Firing and Ceiling-Mounted Speakers in One System?
Yes, you can mix them, but I don’t recommend it. Speaker compatibility issues arise because up-firing uses reflections while ceiling-mounted provides direct sound. This timing mismatch degrades audio performance, creating inconsistent height effects and poor localization across your system.