The subwoofer crawl helps you find ideal bass positioning by temporarily placing your subwoofer at your main listening seat, then crawling around the room while playing a bass-heavy track to identify where low frequencies sound tightest and most powerful. I’ll guide you to mark promising spots with tape, move your subwoofer to the best location, and adjust phase settings between 0° and 180° while fine-tuning crossover frequencies to match your main speakers’ capabilities. This method addresses how bass frequencies interact with room surfaces, corners, and walls. I’ll explain the complete process below, including what to do when results disappoint.
Key Takeaways
- Place the subwoofer at your listening position, then crawl around the room listening for the best bass quality spot.
- Use a bass-heavy music track and listen for tight, punchy, clear bass at each potential location for 15-20 seconds.
- Mark promising spots with tape to easily compare bass quality and identify the optimal placement location.
- After positioning, fine-tune the subwoofer’s phase settings between 0° and 180° and adjust crossover frequency through your receiver.
- Consider adding bass traps in corners or using multiple subwoofers to improve bass distribution and reduce problematic room modes.
What Is the Subwoofer Crawl and Why Does It Work?
Have you ever struggled with finding the right spot for your subwoofer? It can be frustrating when your bass sounds muddy or uneven, and you might wonder how to get that deep, clear sound we all crave. One effective technique is called the subwoofer crawl.
Here’s how it works: instead of setting up your subwoofer in its usual spot right away, you put it where you usually sit while listening. Then, crawl around the room on the floor to identify where the bass sounds best. Why does this matter? Bass frequencies interact with the walls, floors, and ceilings, which can cause certain areas to boom while others fall flat. By positioning the subwoofer in your listening spot, you can hear how it performs in different areas of the room.
When you’re on the ground, take note of a few key factors—like tightness, punchiness, and definition of the bass. It’s a hands-on way to assess how it actually sounds from various positions. Use some tape to mark the spots that impress you, and remember: it’s all about finding that sweet spot for even bass throughout your space.
The best part is this method doesn’t require any fancy equipment. Just your ears, a bit of crawling, and a little patience. You can try this whether you’re setting up a single subwoofer or multiple units. Honestly, it’s a straightforward process that can significantly improve your listening experience.
In short, the subwoofer crawl helps you really dial in your bass placement without breaking the bank. Have you tried this technique before, or are you tempted to give it a shot?
Get Your Room and Gear Ready for the Subwoofer Crawl
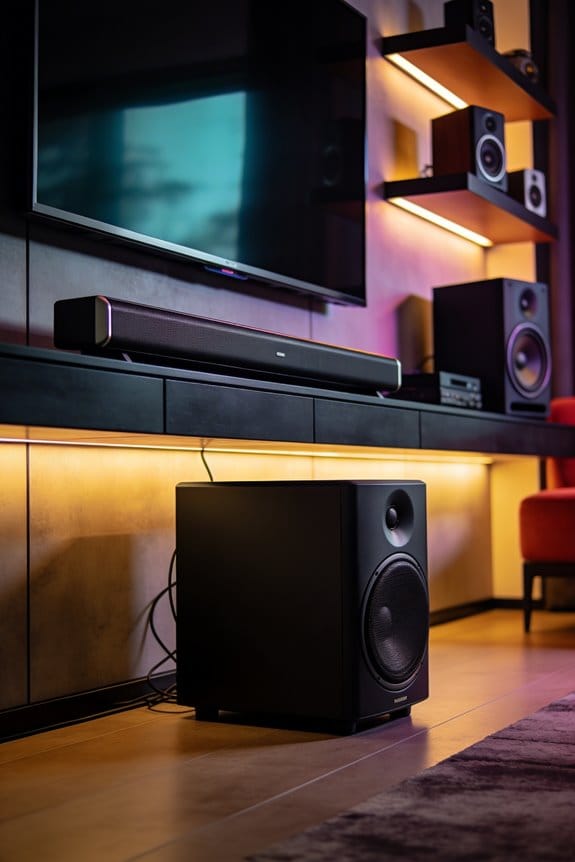
Before you plunge into the subwoofer crawl, you’ve gotta set yourself up right and grab a few key items. First things first, find a good long RCA or subwoofer cable. You’ll need this to hook up your subwoofer’s “Sub Out” or LFE input to your AV receiver. Make sure it’s long enough to reach your main listening spot, with a little extra for any last-minute adjustments.
Next, position your subwoofer on your main seat – yep, right where your head usually sits when you’re diving into a movie or cranking up your favorite tunes. It sounds a bit silly, but trust me, this helps you really pinpoint where the bass hits best throughout the room.
Now, it’s time to pick a bass-heavy music track you know like the back of your hand. This will be your go-to tune for the crawl. Crank the volume up enough to feel the bass engage, but don’t push it to the point of distortion. This setup is what lays the groundwork for really understanding how your room’s acoustics affect that booming bass.
So, why does this matter? Because finding the right spot for your subwoofer can make a world of difference in your listening experience. Take your time with this process; it’s not just about the placement but also about achieving that perfect balance in sound.
In short, gather your gear, set up your space, and have fun exploring the best spots for your subwoofer! Have you ever moved your sub around, only to be blown away by the difference it made?
Perform the Subwoofer Crawl and Evaluate Bass at Each Spot
Have you ever found yourself cranking up the volume, only to be disappointed by the bass in your space? It’s frustrating when you invest in good audio gear, and the sound just doesn’t hit the way you imagine. Let’s talk about a practical way to enhance your bass experience using the subwoofer crawl technique.
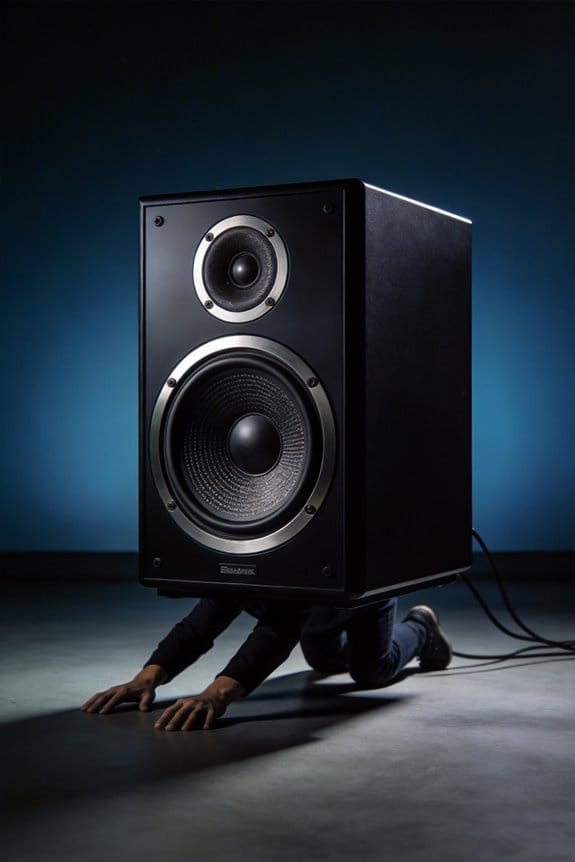
First off, once everything’s set up and your subwoofer’s resting in your main seat, get ready to hit the floor. Kneeling on your hands and knees, it’s time to embark on the crawling process. Start with the corners of the room, then check along the walls, and finally explore the center areas. Stop at each potential spot for about 15 to 20 seconds and really tune in to the bass quality.
Listen for specific traits like:
- Tightness and clarity—no muddiness allowed.
- Consistency across different frequencies.
- Definition and punch in kick drums.
- A clear absence of boomy resonances.
As you go, marking promising spots with tape is a smart idea. This will let you easily compare the different locations by crawling back and forth between them. It’s a practical approach that really highlights the ideal positions for your subwoofer.
So, why go through all this trouble? Because finding that perfect bass sweet spot can drastically improve your listening experience. The best part is, it takes only a little time and effort for results that can make a huge difference.
Wrapping up, the subwoofer crawl is all about finding bass that fine-tunes your audio experience. Why not give it a shot? You might be surprised by what you discover in your own living room.
Move Your Subwoofer to the Best Location
After you’ve pinpointed the best spot for your subwoofer during your crawling evaluation, it’s time to put that knowledge into action. Move your subwoofer from the listening area to the spot you’ve marked on the floor. It’s pretty straightforward—just disconnect the long cable for a moment, shift the subwoofer over to the taped location, and then plug everything back in securely to the LFE or Sub Out input.
Now, here’s a key tip: make sure the subwoofer driver is facing the same direction that gave you the best bass response during your testing—usually toward where you sit. Once you’ve done that, head back to your main listening spot and play the same bass-heavy track you used earlier.
So, how does it sound? Ideally, you want that tight, punchy bass you experienced while crawling. If it feels different, double-check that you’ve placed the subwoofer exactly where you marked it. It’s all about getting that sweet spot right.
Give it about a week of regular listening to see if you notice any improvement. Don’t rush to make more changes immediately; let your ears adjust and really soak it all in. Trust me, sometimes it just takes a bit of time to appreciate the difference. How are you feeling about your setup now?
Adjust Phase and Crossover Settings for Tight Bass
With your subwoofer in the sweet spot, it’s time to tweak the phase and crossover settings. You’ll want the bass to blend nicely with your main speakers, so let’s get into it.
Phase Adjustments
Try this: flip your subwoofer’s phase switch back and forth between 0° and 180° while a bass-heavy track is playing. Focus on the sound of the kick drums from your listening seat. One setting will likely deliver a more powerful and tight bass response. Finding the right phase helps align your subwoofer’s output with your main speakers, which can prevent that annoying weak and hollow bass that nobody wants.
Crossover Frequency
Next up is the crossover frequency. You want to set your AV receiver‘s crossover to align with what your speakers can handle. For example, if you have bookshelf speakers that can handle down to 60Hz, select an 80Hz crossover setting. If you’re rocking larger tower speakers rated at 40Hz, a 60Hz crossover should do the trick. Access these settings through your receiver’s speaker configuration menu to ensure your sub is handling those low frequencies that your main speakers just can’t deliver.
In short, tuning your phase and crossover settings takes a bit of attention, but it’s worth it for the tight bass you’re after. Have you tried any of these tweaks before?
What to Do When No Spot Sounds Good?
Ever feel like every spot in your room sounds wrong? You crawl around your space, and it seems like the corners have boomy bass, the walls create weak spots, and the middle just sounds muddy. This usually means you’re facing some serious bass room acoustics issues called soundwave interference.
So, what can you do about it? Start by adding bass traps in the corners. That’s where low frequencies tend to hang out and create those annoying peaks. Placing your subwoofer about three feet from the corners along the midpoint of your front wall can be a smart move too, as it often helps minimize those pesky room mode problems.
You might still run into frustrating issues, though. Here’s the trick: consider using multiple subwoofers in different locations. This approach can help smooth out your frequency response through what’s known as distributed bass loading. It cancels out unwanted modes by creating destructive interference at certain frequencies while boosting the ones you actually want to hear.
Honestly, tackling room acoustics can feel overwhelming, but with a few adjustments, you can make a big difference. Remember to experiment and find what works best for your space. Got any questions or methods that have worked for you?
Frequently Asked Questions
Can I Perform the Subwoofer Crawl in a Carpeted Room?
Yes, I can perform the subwoofer crawl on carpet. Studies show carpet thickness absorbs up to 10% of bass frequencies. Despite this sound absorption, crawling still accurately identifies ideal subwoofer placement since you’re evaluating relative performance across locations.
How Long Should I Listen at Each Spot During the Crawl?
I recommend spending 15-30 seconds at each spot for ideal testing. This listening duration lets me identify bass quality differences without fatigue. I’ll compare nearby positions by moving back and forth to catch subtle variations effectively.
Does Subwoofer Size Affect the Crawl Technique’s Effectiveness?
No, the crawl works regardless of subwoofer dimensions. Here’s why: room acoustics determine bass response patterns, not driver size. While larger subs impact frequency extension and output, I’ve found the technique identifies ideal placement for any subwoofer.
Should I Remove Furniture Before Performing the Subwoofer Crawl?
I don’t recommend removing furniture before crawling. Furniture affects sound reflection and bass response in your actual listening environment. You’ll want to find the best subwoofer space based on how the room normally performs with everything in place.
Can the Crawl Work With Wireless Subwoofer Connections?
Like Bluetooth headphones at the gym, I’ve found wireless technology works perfectly fine for the crawl. Your wireless subwoofer connection won’t compromise sound quality during testing—you’re simply identifying room acoustics, not evaluating cable performance.