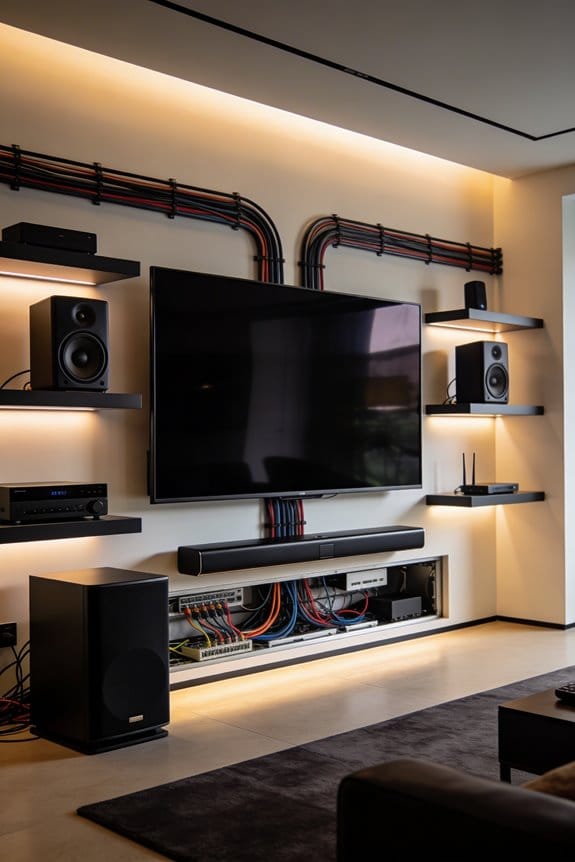
I’ll help you manage complex cable setups by implementing multi-tier tray systems that separate power from fiber optics, reducing electromagnetic interference by up to 30%. You should use wider 24-inch rung ladders for high-density racks now drawing 40-50 kW, install color-coded pathways to cut troubleshooting time by 60%, and add heat-shrink labels with circuit identifiers at both cable ends. I recommend designing oversized conduits with 40% extra capacity for future expansions and positioning fiber cables 12 inches above power lines in dedicated channels. The sections below explain specific hardware categories, installation methods, and modular solutions that future-proof your infrastructure.
Key Takeaways
- Use multi-tier trays and wider rung ladders to separate power from fiber optics, reducing electromagnetic interference and supporting higher rack densities.
- Implement color-coded pathways and heat-shrink labels at cable ends to reduce troubleshooting time by up to 60% in complex setups.
- Install proper support brackets every 3-5 feet depending on material to prevent cable tray sagging and maintain airflow in racks.
- Design for future expansion using oversized conduits with 40% extra space and modular patch panels for quick reconfiguration without rewiring.
- Maintain 12-inch separation between fiber optic and copper cables to prevent up to 30% signal quality degradation from interference.
How Rising Rack Densities Are Breaking Traditional Cable Systems
Have you noticed how much more power our data racks need these days? It’s staggering. Back in 2015, most racks were pulling around 8-10kW. Now, it’s common to see racks needing 40-50kW! This increase means traditional cable management systems are really struggling to keep up.
When rack densities rise, you might notice a few issues creeping in. Older cable trays sag under the weight of those hefty conductors, vertical managers can’t contain the bundled cables, and airflow blockages pop up, leading to annoying hot spots that slow down your equipment.
The problem lies in outdated systems. They were designed for narrow 4-inch ladder racks and single-tier pathways that catered to only copper cables. You want reliability and safety, so consider this: you need wider rung ladders that can support over 150 pounds per linear foot. Double-stacked basket trays are a solid choice because they separate power from fiber optics. And please, make sure to mount everything to structural steel rather than ceiling grids—this is crucial for handling those increasing load demands.
Choosing the Right Cable Trays, Ladders, and Conduit Hardware

Have you ever found yourself staring at a tangled mess of cables, unsure of how to organize everything? Cable management can feel daunting, but it doesn’t have to be. Understanding the main categories of hardware involved in cable management will help you make informed choices for your installation.
There are three primary hardware categories to consider: cable trays, ladders, and conduit. Each has its own load ratings, material specifications, and application limits that you’ll want to understand before making a purchase. Think of cable trays, for instance. They’re available in steel, aluminum, or fiberglass, with weight ratings ranging from 50 to 200 pounds per linear foot. That’s crucial info based on the weight of your cables, right?
Ladders come in different styles like straight-rung, wire-mesh, and ventilated designs. These are designed to make your life easier when you need to add or move cables around. And don’t forget about conduit sizes—you can find them from ½-inch to 6-inch diameters, which will depend on your specific fill ratios and bend radius requirements.
When you’re setting everything up, you’ll need to mount support brackets every 5 feet for steel trays and every 3 feet for aluminum ones. Installation requires some basic tools such as torque wrenches, cable pullers, and fish tape. If you want to optimize your space, make sure your tray width matches the diameter of your cable bundle and try to maintain a 40% fill capacity for heat dissipation and room to grow later.
Honestly, getting this right can save you a lot of headaches down the road. It’s all about making informed choices and understanding your specific needs. So, as you explore these options, keep your future expansion in mind. Are you ready to tackle your cable management like a pro?
Installation Methods: Underground Trenches vs. Overhead Pathways

Have you ever thought about how the way you install infrastructure could really shape your project’s future? It’s a big deal. Decisions you make about whether to go underground or overhead can impact timelines, costs, and even how much maintenance you’ll deal with down the line.
When it comes to underground installations, there are some clear benefits. For one, these setups protect against environmental damage, keep your space looking neat, and provide better security for important cables. You’ll want to think about using multi-duct trenches that combine power, fiber, and control lines. This approach can really help cut down on costs over the lifecycle of your infrastructure. Plus, this underground option is growing rapidly—about 10.48% each year—as more people focus on strengthening the grid and installing EV charging stations.
But let’s not overlook the overhead pathways. They come with their own set of hurdles like weather exposure and physical wear that can break down cable jackets as time goes on. Yet, they still have a solid 37.05% share of the market. Why? Because they’re quicker to install and easier to troubleshoot, which can save you from the headaches of long downtimes. You can access cables without having to dig, making it simpler to handle repairs and expansions in places like data centers or warehouses.
Cable Management Strategies for 40-50kW Data Center Racks
As rack power density climbs to 40-50kW in modern data centers, it’s time to rethink your cable management strategies. This isn’t just about organizing cables; it’s about managing load and heat effectively. You might be wondering, how do you get started with this?
First off, consider installing multi-tier trays. These help keep your power cables separate from fiber optics, which can really cut down on electromagnetic interference and thermal buildup. Here’s the trick: use wider rung ladders that span 24 inches. This way, you can accommodate those hybrid copper-fiber bundles without exceeding fill capacity.
Double-stacked basket trays are another effective option. They allow for better routing of various cable types while making sure you’re maintaining proper bend radius specifications. Think about color-coded pathways as well—these can differentiate between power, data, and control circuits, making troubleshooting much quicker.
Positioning under-floor raceways is crucial too. This setup enables quick rack reconfigurations, especially as AI clusters expand. You definitely want to make sure you’ve got strain-relief glands that are rated for 40-ampere loads and vertical cable managers every 6U to prevent sagging.
So, what does all this mean for your data center? Well, it’s about creating an organized and efficient environment that can handle the demands of high density solutions. Honestly, taking these steps can make a real difference in your operations.
Why You Need to Separate Fiber and Copper Pathways
Have you ever noticed that when you run fiber optic and copper cables together, things start to go haywire? Electromagnetic interference from power lines can mess up your signal quality, sometimes by as much as 30%, especially in crowded spaces. That’s why it’s super important to keep these cables separate.
Try this: set up your cabling with fiber isolated from power lines by using multi-tier trays. Place your copper power cables in the bottom tier and keep the fiber optics at least 12 inches up. This simple tweak can save you a ton of headaches by preventing interference from disrupting your high-bandwidth connections like 25G, 40G, and 100G Ethernet.
You may be wondering how to manage all this. Well, here’s the trick: make sure to install strain-relief glands at all the entry points. This will hold each cable type securely and cut down on movement that could lead to interference.
Now, if your data center’s rocking a rack density of 40-50kW, you need dedicated fiber channels. Ladder-type supports are perfect for the optical cabling while you can use enclosed conduit systems for the copper. Honestly, it makes a world of difference in maintaining signal integrity.
Color-Coded Labeling Systems That Cut Troubleshooting Time
Ever find yourself bogged down in a server room, sifting through a jungle of identical cables? It’s frustrating, isn’t it? That’s where color-coded labeling comes in handy. By implementing a simple color scheme, you can cut down troubleshooting time by as much as 60%.
Try this: designate red for power distribution, blue for data networks, and yellow for fiber optic lines. This isn’t just random advice—it’s becoming standard practice in many data centers using modular patch panels and structured pathways to keep things organized.
Here’s the trick: apply heat-shrink labels at both ends of each cable. Make sure to include circuit identifiers, destination codes, and installation dates. When you match your labeling system to the rack layouts, it becomes way easier for technicians to track circuits without the hassle of unplugging adjacent bundles or disrupting live connections—especially in those crowded environments with 40-50kW density.
So, why does this matter? Because in high cable density areas, having a clear labeling system can save a ton of time and frustration. Honestly, it’s just about making your life easier in the long run.
Modular Patch Panels and Under-Floor Raceways for Easy Reconfiguration
Are you tired of feeling stuck with your data center setup? It can be a real hassle when your workloads change and your fixed-panel installations just aren’t cutting it anymore. Modular patch panels might be the answer you’re looking for. They allow you to swap out entire connector blocks without needing to rewire the backbone. Honestly, this can cut down your changeover time from hours to just minutes.
Pairing these modular panels with under-floor raceways makes a lot of sense. Cables can be neatly routed beneath raised floors, letting you access pathways quickly through removable tiles. That means you can adjust your setup at any rack position without breaking a sweat.
When power densities climb to 40-50kW, you need systems that allow for efficient reconfiguration. It’s crucial to stay nimble, repositioning servers as needed. Here’s the trick: Install snap-in RJ45 cassettes in your patch panels and run separate bundles for fiber and copper through dedicated under-floor channels. Don’t forget to label each raceway segment. Keeping power and data paths cleanly separated simplifies your workload during equipment moves.
The best part is, these systems aren’t just about speed. They also help minimize clutter in your data center and simplify maintenance. So, why does this matter? A more organized environment reduces downtime and frustration.
In the end, going modular could save you headaches down the line. Have you considered how your setup can adapt to the demands of today’s data workloads?
Designing Cable Infrastructure for 100G Ethernet and Beyond
High-speed networks require cabling that can smoothly handle 100G Ethernet and the newer 400G standards. What’s the key? If you’re looking to keep up with the pace, use multi-mode fiber for distances under 300 meters. For longer runs, single-mode fiber is your best bet, giving you the bandwidth flexibility to adapt as your gear evolves.
Thinking ahead is crucial. Future-proof your infrastructure by installing oversized conduits—aim for at least 40% larger than what you think you need now. This way, when it’s time to pull additional cables, you won’t need to break open walls or disrupt your setup.
Here’s a tip: set up structured pathways that keep copper power feeds separate from your optical data lines. This helps reduce electromagnetic interference, which can be a real hassle. Plus, when it comes time to connect your cables, I recommend using breakout cables with MPO connectors at your patch panels. That makes it easy to switch from 40G to 100G just by changing transceivers instead of rewiring your entire rack.
And don’t forget labeling! Use color codes that match your network topology diagram for each strand. It’ll make troubleshooting a lot faster, especially when you start seeing more density thanks to AI workloads or virtual server clusters. Can you imagine having to figure out a spaghetti mess of cables in a panic?
Truth is, investing a little time and forethought into your cable infrastructure pays off when it comes to speed and efficiency. It might seem tedious now, but you’ll be glad you did it later. So, what’s stopping you from getting started on this?
Frequently Asked Questions
How Does AI Cluster Growth Impact Cable Pathway Requirements in Hyperscale Facilities?
AI clustering devours bandwidth like wildfire. I’ve seen hyperscale requirements multiply cable pathways exponentially—rack densities hit 40-50kW, demanding infrastructure optimization through double-stacked trays and under-floor raceways. Cable efficiency becomes your survival strategy here.
What Fire-Rated Materials Meet Underground Cable Trench Safety Codes?
I’d recommend fire-rated PVC conduits, mineral-insulated cables, and flame-retardant cable insulation that meet NEC Article 310 standards. These materials guarantee fire safety in underground trenches by resisting heat propagation and maintaining circuit integrity during emergencies.
Can Liquid-Cooled Servers Reduce Overall Cabling Complexity in High-Density Racks?
Yes, liquid cooling consolidates power delivery through fewer, higher-capacity lines since you’re offloading thermal management from air handlers. I’ve seen cabling efficiency improve dramatically when coolant distribution replaces bulky forced-air ducts in high-density racks.
Which Regional Markets Show Fastest Adoption of Modular Cable Management Systems?
I’ll paint you a vivid picture: North America’s leading the charge with modular cable management systems, driven by data center booms. Asia-Pacific’s rapidly catching up through China and India’s urbanization, while Europe embraces wireless integration alongside regional trends.
How Do DOCSIS 4.0 Upgrades Affect HFC Cable Infrastructure Planning?
I’ve found DOCSIS 4.0 upgrades demand amplifier replacements and node splits to handle higher frequencies. While infrastructure challenges increase upgrade costs, the DOCSIS benefits—10Gbps symmetrical speeds and improved telemetry—ensure future scalability for your HFC networks.