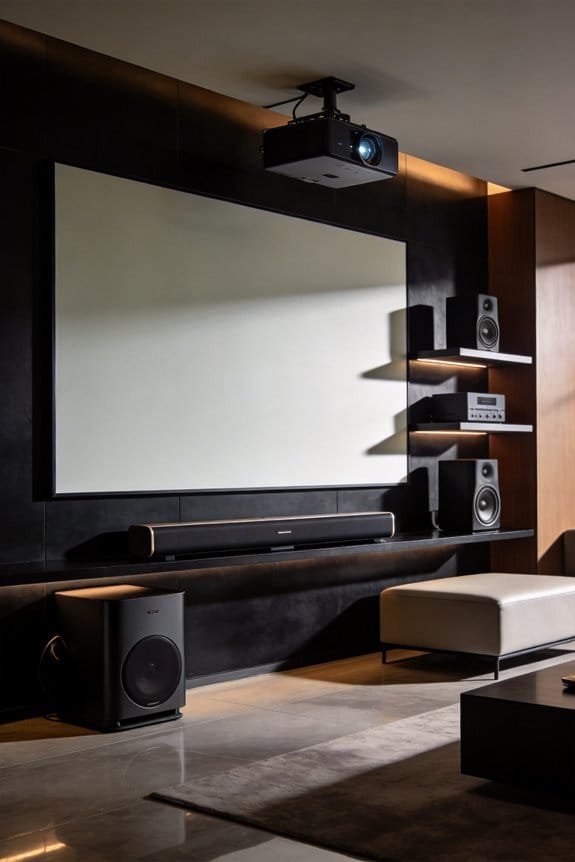
I’ve found that ultra-short-throw projectors create a significant audio challenge because they sit just inches from the screen, occupying the exact spot where your center channel speaker needs to be for ideal dialogue clarity. This spatial conflict forces you to choose between optimal picture placement and proper sound staging, which traditional projector setups never face. You’ll need to evaluate alternative speaker layouts like wall-mounting, in-ceiling installation, or under-screen consoles to work around this obstruction, and the built-in audio often falls short for rooms larger than 150 square feet. The sections below explain specific placement strategies, connection options, and calibration systems that address these unique positioning constraints.
Key Takeaways
- UST projectors positioned inches from screens create spatial conflicts with center channel speakers at ear level.
- Built-in projector audio often lacks volume and clarity for larger rooms, struggling with dialogue and bass reproduction.
- Alternative layouts include in-ceiling mounting, wall-mounted perimeter speakers, under-screen consoles, and satellite stand systems.
- Front speakers should angle 22-30 degrees toward seating, with center channels placed directly below the screen.
- HDMI ARC supports Dolby Atmos, while optical cables limit to compressed 5.1 audio formats.
Why UST Projectors Make Audio Placement Complicated
Ultra-short-throw projectors can be a fantastic addition to your home theater setup, but they’ve got their quirks—especially when it comes to audio placement. Since these projectors sit just inches away from the screen, they create some unique challenges that you might not run into with traditional projectors.
When you place the projector right in front of your viewing area, it blocks the perfect spot for your center channel speaker. Ideally, this speaker should be at ear level and positioned below the screen to ensure the best sound experience. But with a UST projector practically sitting on a low cabinet, you’ve got a spatial conflict on your hands.
Audio interference is another issue. If you’re relying on the projector’s built-in soundbar, it could clash with your external speaker setup, leading to some not-so-great audio quality. Plus, those compact designs might be attractive but can cause vibrations that distort sound, especially if speakers are mounted on the same surface as the projector.
So, what can you do? Here are a few tips:
- Plan your speaker layout carefully to avoid blocking the projector and ensure the best sound projection.
- Consider mounting your center channel speaker on the wall above or below the screen instead of placing it on the same surface as the projector.
- Experiment with speaker placement to minimize the chance of vibrations affecting your sound quality.
Truth is, getting the audio just right takes a bit of planning and adjusting. Just keep in mind that once you sort out the positioning, those UST projectors can really shine. Have you thought about where you’ll place your speakers yet?
When Should You Upgrade Beyond Built-In Projector Audio?
When you’re watching a movie or a big game and the sound just isn’t cutting it, that’s a real buzzkill. Sure, built-in projector audio might be enough for casual viewing, but if you find yourself leaning in to catch dialogue, constantly fiddling with the volume, or feeling the action just isn’t hitting you the right way, it’s definitely time to think about an upgrade.
Here are some signs you should keep an ear out for:
- If you’re straining to hear conversations, especially during scenes packed with multiple characters or layered with background music, that’s a red flag.
- Or, when those bass drops during explosions or epic musical scores just feel flat, even cranked up to max, it’s a sign your built-in speakers are dropping the ball.
- For larger spaces, if your projector can’t pump out more than 75-80 decibels, you might as well watch in silence. Rooms over 150 square feet deserve better sound.
- And let’s be honest, if you’ve mounted your projector in a cabinet or too close to a wall, it can seriously muffle the sound. When those speaker grills get obstructed, you’re not getting the full picture—or sound, for that matter.
Honestly, if you’re diving into content that demands 5.1 surround sound or Dolby Atmos, those fancy features just won’t shine through with built-in audio alone. Here’s the trick: an external audio setup can improve your movie nights or game days tenfold. So, why not give yourself that cinematic experience?
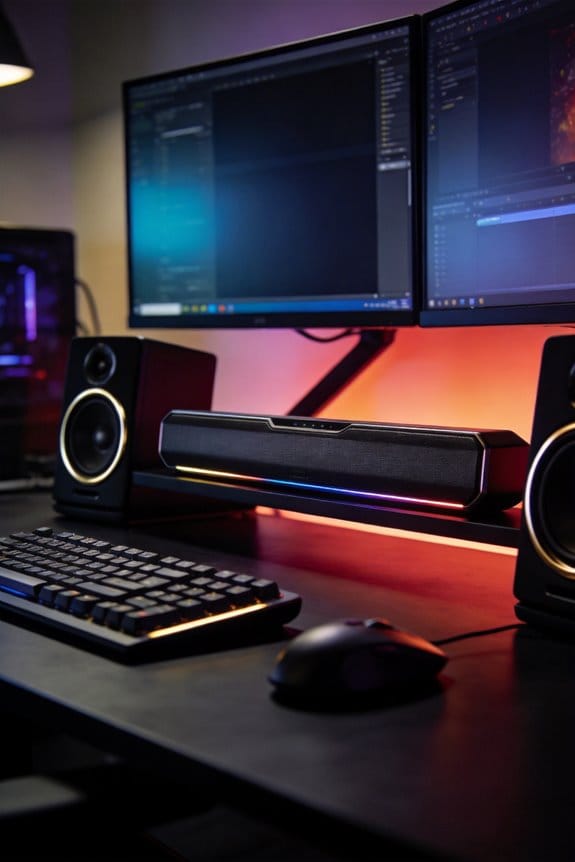
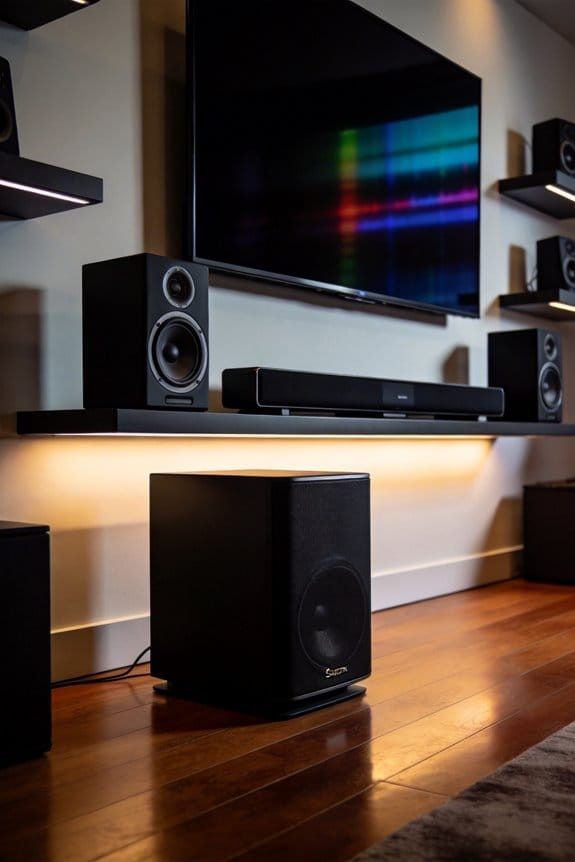
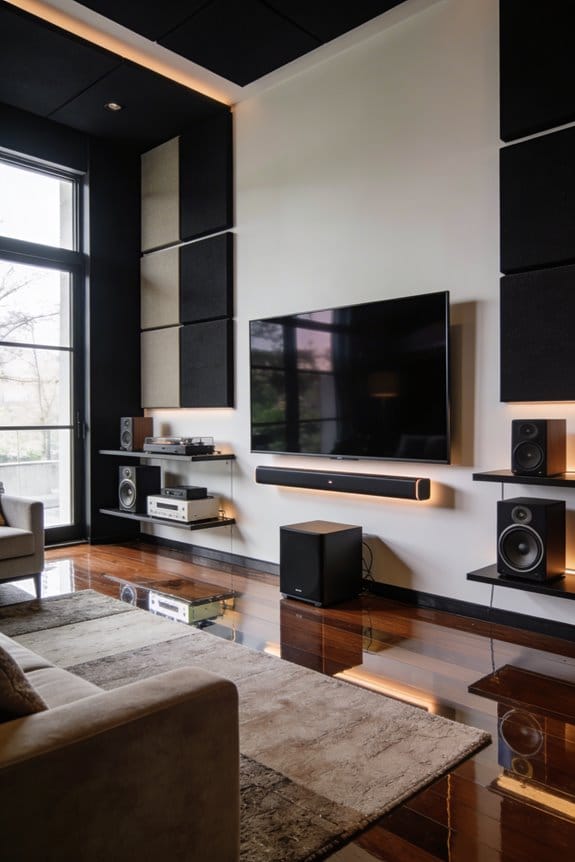
Four Speaker Layouts That Won’t Block Your Screen
When setting up a UST projector, you might find that speaker placement can be a real headache. Traditional audio setups often end up blocking your screen, which can ruin your viewing experience. So, how do you get around this issue? Here are a few layout ideas that can help keep your setup neat and functional.
In-Ceiling Front Channel Configuration
Consider mounting your front speakers—left, right, and center—up in the ceiling right above the screen area. This way, the viewing space stays completely clear, and you won’t have to worry about obstructed views. Plus, having the speakers in the ceiling allows for proper sound positioning, creating a more immersive soundstage.
Wall-Mounted Perimeter Setup
You can also go for a wall-mounted setup by installing speakers around your screen using adjustable brackets. Try placing the left and right channels at ear level, about 22 to 30 degrees from where you’re sitting. For the center channel, mount it below the screen to keep things balanced. This arrangement keeps everything tidy and accessible while ensuring great sound quality.
Under-Screen Console Arrangement
Another option is to put all your front speakers on a low cabinet beneath your projection surface. This configuration makes it easy to balance the audio since all channels stay at a consistent height. It’s also a practical solution if you’re short on wall space or want to achieve a clean look without clutter.
Satellite Stand System
If you’re into a more compact setup, consider using small bookshelf speakers on dedicated stands. This option gives you the flexibility to adjust their height and position, so you can fine-tune your sound experience however you like.
Truth is, with a little creativity, you can make your home theater setup work perfectly without blocking your screen view. Choose one of these speaker arrangements, and you’ll be well on your way to enjoying movies the way they were meant to be seen and heard. What’s your favorite setup that keeps everything clear and sound?
Soundbar vs. Surround Sound: Which Fits Your Space?
Once you’ve found the perfect spot for your speakers around that UST projector setup, you’re faced with a big decision: soundbar or full surround sound? This choice can really impact your audio experience, so it’s worth taking a moment to think about your space and needs.
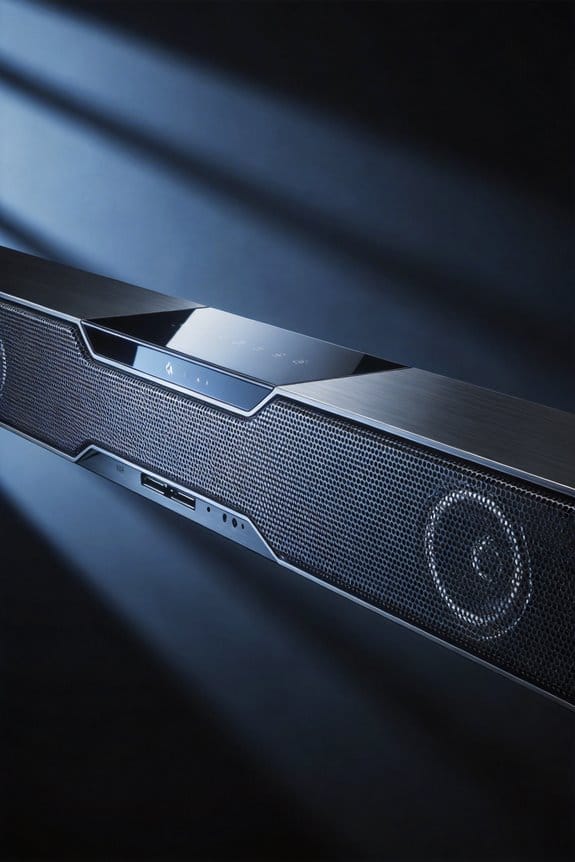
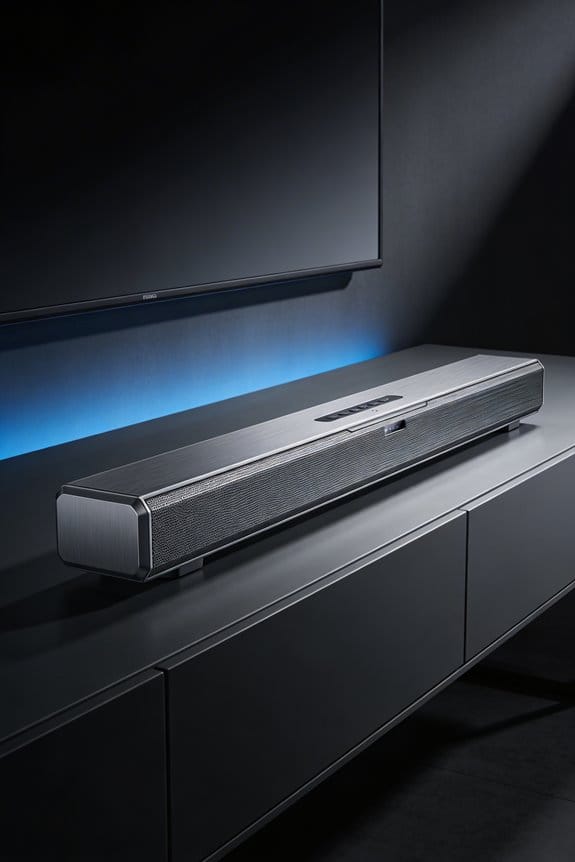
Soundbars are pretty handy since they pack multiple speakers into one sleek unit. They can fit nicely below your screen or on a low cabinet, making them a great option if you’re short on space. A decent 5.1.2 channel soundbar can deliver enveloping sound without the need to place speakers all over the room. It’s like having a full sound system without the clutter.
On the flip side, if you’re serious about sound quality, a full surround sound system might be the right route. These setups involve separate speakers that create a more immersive sound experience because they’re positioned precisely around the room. Just keep in mind that they need more space and often require you to mount some speakers on the walls.
If you’re thinking about an external surround sound setup, don’t even worry about the projector’s built-in speakers—they probably won’t measure up anyway. Here’s the trick: pick soundbars for compact areas under 150 square feet. For those dedicated home theater spaces, go for a surround sound system if you have the room.
Where to Position Front Speakers Without Ceiling Mounting?
When you can’t mount your front speakers to the ceiling, you might feel a bit stuck. But don’t worry, there are plenty of solid options that can work well with your UST projector setup.
Consider wall-mounted speakers on stands or brackets. This gives you the flexibility to place them where they sound best while keeping the audio aligned at ear level. Try placing the left and right speakers on the wall, right next to the screen, at about a 22-30 degree angle from your main seating area. The center channel should go directly below the screen, either on a low cabinet or a dedicated stand. Just make sure the tweeter is at the same height as your ears when you’re seated.
If you’d rather keep things simple, you can set all three front channels on a console right beneath the screen. Just angle them up about 15-20 degrees to direct the sound right at you, which can really help with the audio experience across the room.
Can You Install Speakers Around the Screen Perimeter?
Are you struggling with limited space in your room and want to enhance your audio experience? Installing speakers around the screen perimeter can be a smart move. It keeps your audio front and center, fitting seamlessly into your room’s layout.
For the left and right channel speakers, try placing them on vertical stands right next to your screen edges. Aim for a distance of about 6-8 feet apart. This keeps the stereo separation just right. The center channel is best positioned directly above or below the screen. This setup improves dialogue clarity, ensuring it aligns with what you’re watching.
This way of installing speakers works wonders, especially with UST projectors. Since these projectors sit low, they leave plenty of room for your audio gear. So, how do you make sure everything sounds just right? You’ll want to check the alignment. Go into your receiver’s setup menu and test the distances to ensure all channels hit your listening spot at the same time.
Don’t forget to angle the speakers slightly inward. This little trick targets your primary seating area, enhancing the soundstage imaging.
How to Mount In-Ceiling Speakers for UST Setups?
What do you do when your ceiling height is a real issue for your ultra-short throw (UST) projector setup? In-ceiling speakers can be a perfect solution. They keep everything tidy and out of sight, while still delivering impressive sound.
Think about where you place your speakers. Position your front left and right speakers at angles between 22 and 30 degrees from where you sit, ensuring they’re at ear level when you’re comfortably seated. For the center channel, placing it just above or slightly in front of the screen’s top edge will really anchor your dialogue. It’s also smart to keep the front speakers about 6-8 feet apart, especially if you’re in a standard living room.
Now, here’s how to get those in-ceiling speakers installed:
- First, you’ll want to cut mounting holes using the provided template. It’s crucial to do this before running the speaker wire through the attic space.
- Next, install your speakers in the accessible ceiling joists. Make sure you use mounting brackets that can support the weight of your speakers.
- Don’t forget about the tweeters! Angle those adjustable tweeters toward where you’ll be sitting. This little tweak can help direct those high-frequency sounds right at you.
- Finally, test the audio calibration using your receiver’s auto-setup microphone. It’ll make sure everything sounds just right.
In the end, a solid speaker setup can really enhance your audio experience without cluttering your living space. So, are you ready to tackle that installation?
What Audio Cables and Connections Do UST Projectors Need?
Have you ever set up your speakers only to realize they’re not connecting to your UST projector? It can be a real hassle if you don’t have the right cables. HDMI ARC is your best bet for a straightforward connection. It lets you transmit both video and audio in one go. This is super helpful since it keeps things tidy and ensures your sound stays clear.
If you’re dealing with older gear or unique setups, don’t forget about optical audio cables. These guys are great because they send digital audio without interference, which can really make a difference in sound quality. Some UST projectors also throw in 3.5mm auxiliary ports, letting you connect basic speakers. Just keep in mind that this analog method doesn’t quite match the clarity of digital options.
When you’re picking your audio cables, make sure the ports on your projector align with the inputs on your sound system. It’s crucial. With a compact UST setup, you’ll want to manage your cables effectively. A little organization goes a long way in preventing signal issues and keeping your space looking sharp.
Should You Use HDMI ARC or Optical Audio Outputs?
Have you ever struggled with connecting your UST projector to external speakers? It can get pretty confusing figuring out how to get the best sound quality out there. Fortunately, you’ve got two solid options: HDMI ARC and optical audio outputs. Each has its perks, so let’s break it down.
HDMI ARC (Audio Return Channel) is the way to go if you want an easier setup. It sends audio and video signals through a single cable, which cuts down on clutter. The best part is that it supports high-resolution audio formats like Dolby Atmos and DTS:X, giving you a premium sound experience. Why does that matter? Well, if you care about getting the most out of your movies and music, HDMI ARC can help deliver that rich sound without any issues. Plus, it has the capacity for uncompressed audio, making it a top choice for quality sound.
On the flip side, there’s the optical connection. This setup uses a fiber-optic cable to transmit sound as light pulses, which keeps your audio safe from electrical interference. It’s reliable, but it does have some limits. You’ll only get compressed audio formats with optical connections, and they max out at 5.1 channel support. So, while it works for basic surround sound, you won’t be able to enjoy those fancy audio formats we talked about earlier.
In short, if your soundbar or receiver supports advanced audio formats, HDMI ARC is where you should head. But if your audio needs are a bit simpler, opting for optical can still give you decent sound without the hassle.
What’s your setup like? Are you leaning more toward HDMI ARC or optical for your projector?
Which UST-Compatible Audio Systems Include Auto Room Correction?
How do you make sure your UST projector gives you balanced audio all around the room? It can be tricky—there are so many factors at play, like the room size and where your furniture is. Luckily, auto calibration tech can jump in to save the day. It measures the acoustic characteristics of your space and tweaks the speaker output so everything sounds just right.
Systems with Built-In Auto Calibration:
Let’s talk about a few great options with built-in auto calibration features.
- Sonos Arc soundbars are one of the easiest to use. They have Trueplay tuning that runs through iOS devices, analyzing how sound bounces off your walls. This helps optimize the audio to fit your space better.
- Denon AVR receivers come equipped with Audyssey MultEQ calibration. They use measurement microphones to ensure the audio from each channel is perfectly balanced, which can make a noticeable difference in your movie or music experience.
- If you’re looking at Yamaha MusicCast soundbars, they use YPAO (Yamaha Parametric Acoustic Optimizer). This tech adjusts frequencies based on where you’re sitting, so you get a better audio experience from any spot in the room.
- Samsung’s HW-Q series soundbars have something called SpaceFit Sound technology. It’s designed to adapt the audio output based on your surrounding environment, making setup a breeze.
These options mean you can skip the hassle of manual adjustments. Consistent audio quality is within reach, no matter how you set up your UST projector. So, why is this important? Because a great audio setup can really enhance your viewing experience, making everything—from movies to music—more enjoyable.
In a nutshell, if you’re in the market for a UST projector and want to get the most out of your audio, consider one of these systems with auto calibration. They offer a straightforward way to get sound that adapts to your unique space. What features matter most to you when choosing an audio system?
Frequently Asked Questions
Does Projector Placement Distance Affect Audio Delay or Synchronization Timing?
No, I’ve found that projector placement distance doesn’t create audio latency issues. Modern synchronization technology in UST projectors maintains perfect audio-video timing regardless of throw distance, since digital signals travel instantaneously through HDMI connections.
Can Wireless Speakers Work Effectively With Ultra-Short-Throw Projector Configurations?
Yes, I recommend wireless audio systems for UST projectors since they eliminate cable clutter in tight spaces. Modern wireless speaker configurations sync reliably via Bluetooth or Wi-Fi, offering flexible placement around your screen without compromising sound quality.
How Does Room Size Influence Minimum Audio System Requirements for UST Setups?
Smaller rooms under 150 square feet can use 3.1 systems, while I’d recommend 5.1.2 configurations for larger spaces. Minimum room dimensions directly affect ideal speaker placement—you’ll need adequate wall clearance for proper soundstage positioning around your UST screen.
What Acoustic Treatments Prevent Echo in Rooms With UST Projector Installations?
I’d recommend installing soundproof panels on bare walls and ceilings for effective echo reduction. These acoustic treatments absorb sound reflections that otherwise bounce around your UST setup, greatly improving dialogue clarity and overall audio quality during viewing.
Do UST Projector Fans Create Noise Interference With Nearby Audio Equipment?
UST projector fan noise can create audio interference with nearby speakers, especially during quiet scenes. I recommend positioning your projector at least 2-3 feet from front speakers to minimize this disruption and maintain clear sound quality.